Creating Lightboxes
In photogrammetry, the most important thing is getting well-lit, clear images of consistent quality. If you don't get that right, you will never get good results.
You need soft, diffuse light coming from every angle. Shadows, and difference in brightness are your enemies.
To achieve this, I modified a design (from here) and made it collapsible. Check out the original, it's phenomenal work. It's simple, inexpensive, and you can easily adapt it as you need.
(Click on any image below for larger version. Oh, and PDF version for download coming soon.)
What you'll need:
Items needed (for 1 box):
2 Sheets of foam-core board 20"x30"
2 1600+ lumen lightbulbs (CFL or LED - not incandescent, too hot)
1 Y-shaped light socket splitter
1 Hemma light cord from IKEA
3 yards of fabric to cover the fronts (thinner is better)
1-2 14 yard boxes of sticky-back velcro (WHITE!)
1 roll of white duct tape
Tools:
Utility knife (with fresh blades)
Long ruler (or tape measure + straight edge)
Step 1: Cut out the forms
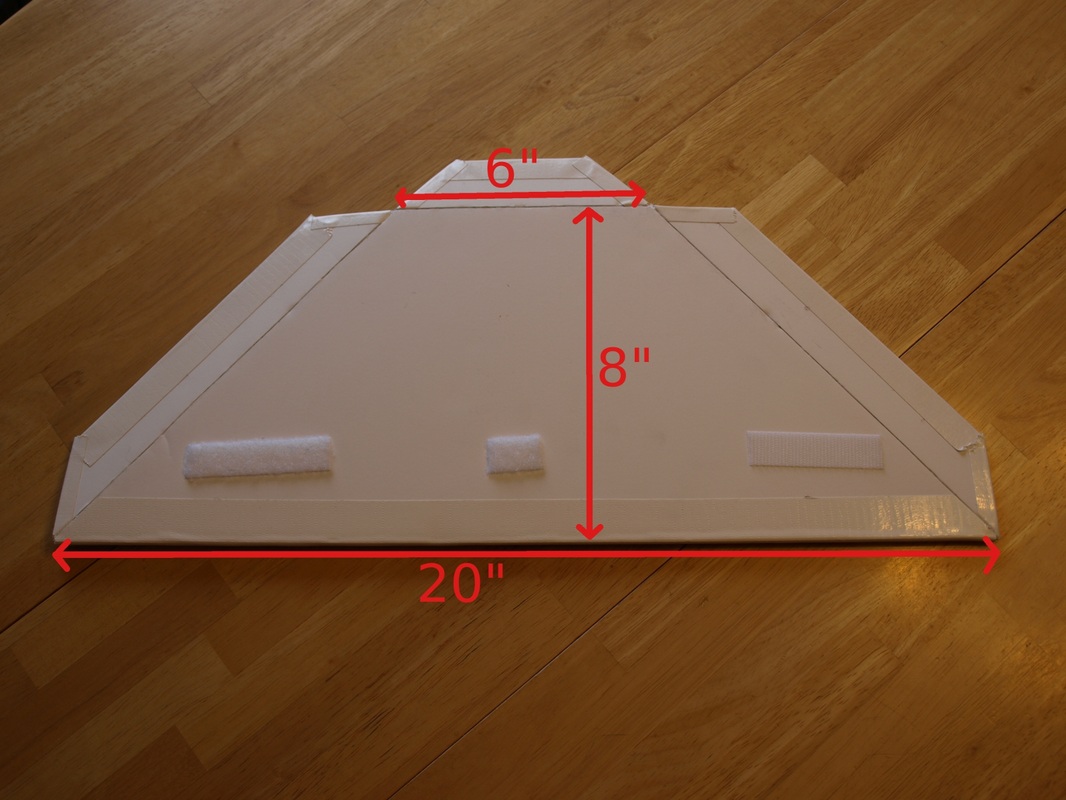
This is the bottom and top of the box, so cut two of this shape.
The tabs are 1 1/2" wide (so this shape is actually 20" x 9 1/2").
I drew the shape on the board, cut out the shape, then using the utility knife, scored the inside edge of the tabs, just enough to cut the paper on one side. You can then snap the foam by bending the tabs. Do not cut through the board!
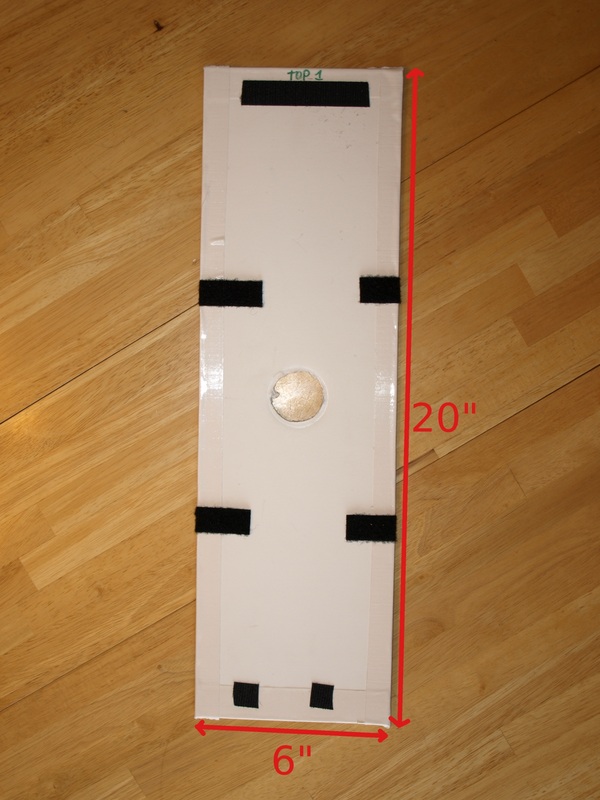
This is the back where the light fixture will go.
No tabs here.
Just one of these per box.
No tabs here.
Just one of these per box.
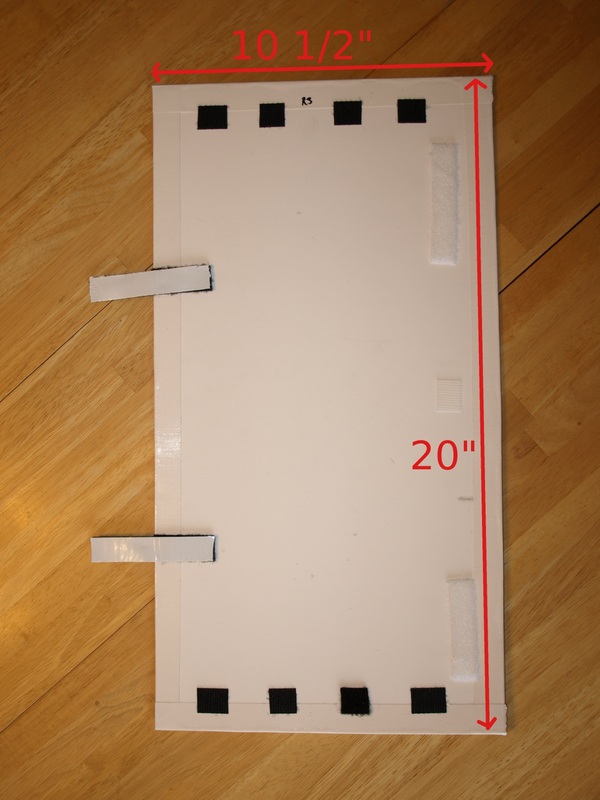
This is one side. So cut two of these.
(No tabs here either.)
(No tabs here either.)
Step 2: Tape the edges
Since we want to make this collapsible and portable, we need to keep our edges safe. Take your white duct tape and wrap it around each exposed edge.
The only exposed foam I didn't tape was the insides of tabs - it would have prevented the top and bottom from laying flat, when collapsed.
The only exposed foam I didn't tape was the insides of tabs - it would have prevented the top and bottom from laying flat, when collapsed.
Step 3: Apply the Velcro
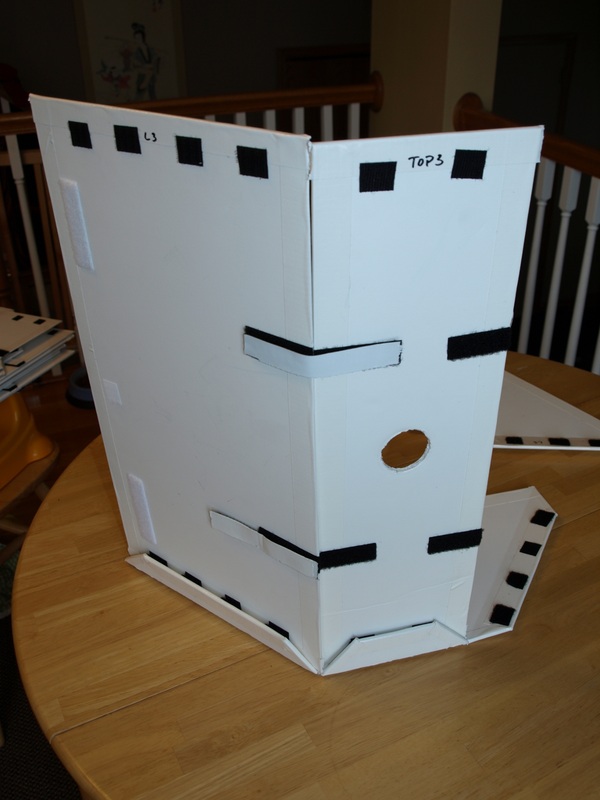
Learn here from my mistakes: don't use black velcro. Each time you tear open the velcro, little black hairs come flying off and static attaches them to your box. Ugh.
Nothing fancy needed here. I stuck the two sides of the velcro together and cut them to size.
Then I peeled the backing off one side and stuck it in place.
Then I peeled off the other backing, put the other piece of foam board in place, and pressed them together.
I also used some strips to hold the long sides of back and sides together and stuck duct tape to the exposed sticky side of the velcro.
TIP:
Label the sides that go together, so you know which tab goes with which long piece of board. Because, unless you perfectly align everything, none of the velcro will match anywhere but its original mate.
Oh, and I'd probably go with two longer strips of velcro, rather than four short squares.
Oh, and I'd probably go with two longer strips of velcro, rather than four short squares.
Step 4: Install the fixture
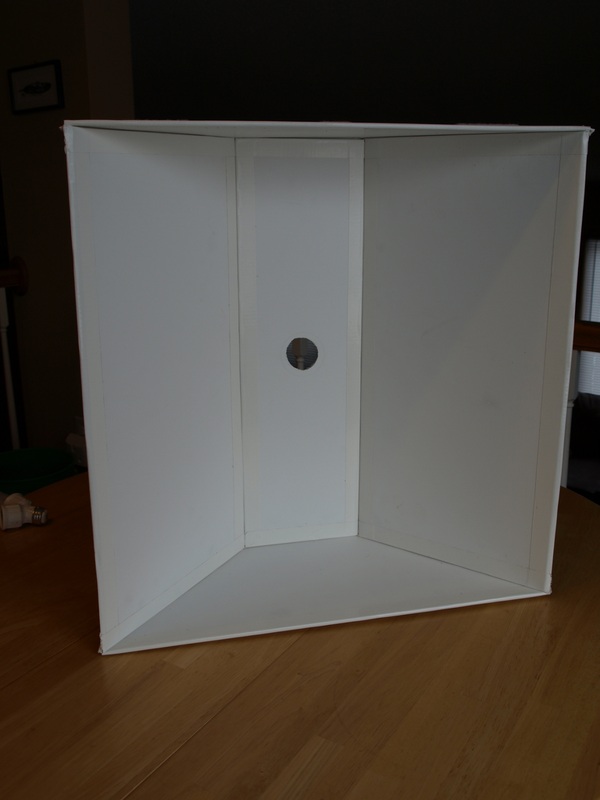
If you refer to the first image of the back of the box, you'll notice a large round hole.
In the center of the back, trace the size of the fixture, and then cut it out. Don't worry if it's not perfect, the fixture will cover minor errors.
Unscrew the cap, insert the fixture and screw the cap back on. This will secure it quite happily.
In the center of the back, trace the size of the fixture, and then cut it out. Don't worry if it's not perfect, the fixture will cover minor errors.
Unscrew the cap, insert the fixture and screw the cap back on. This will secure it quite happily.
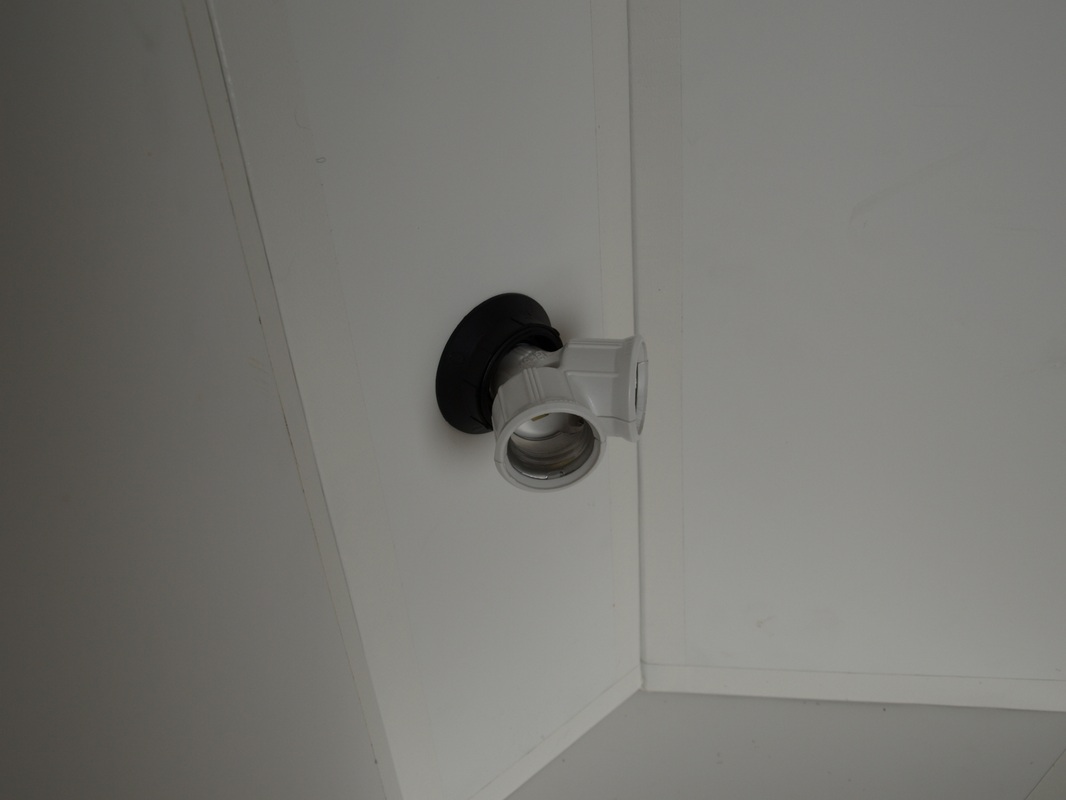
The fixture from the inside.
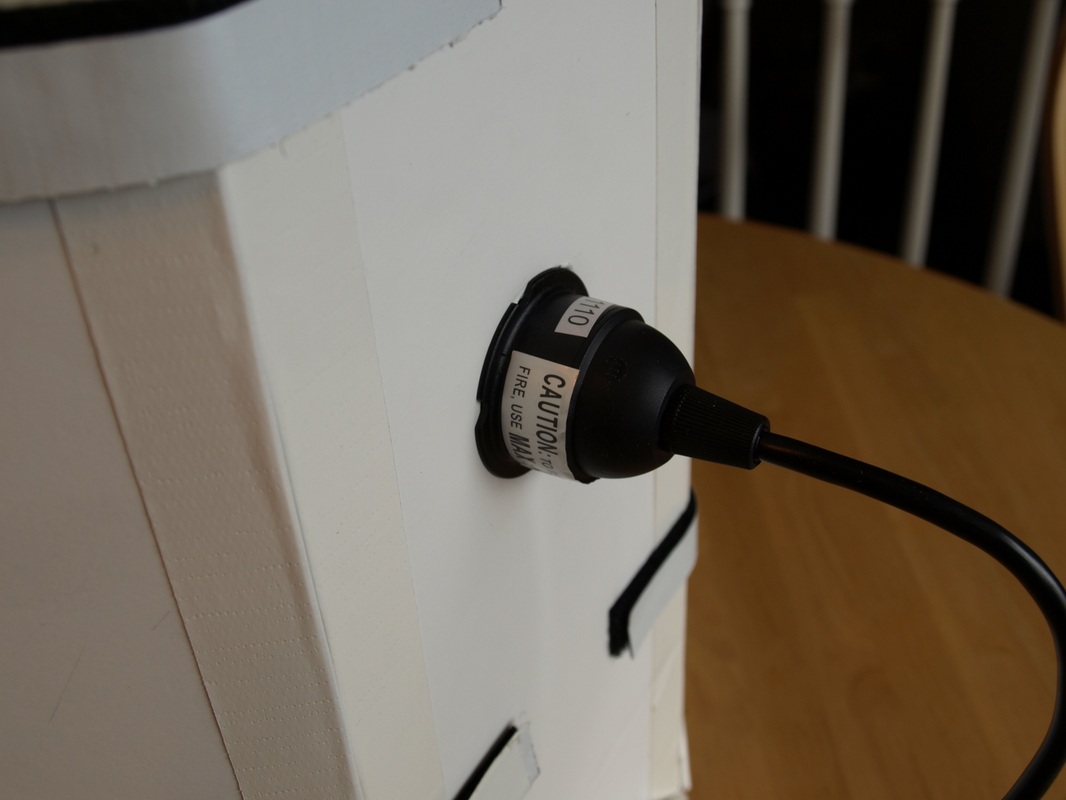
The fixture from the back.
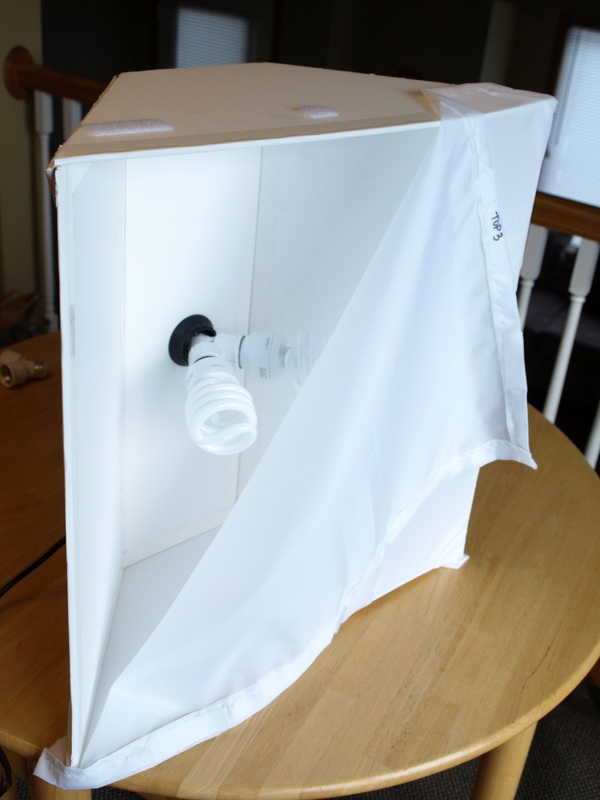
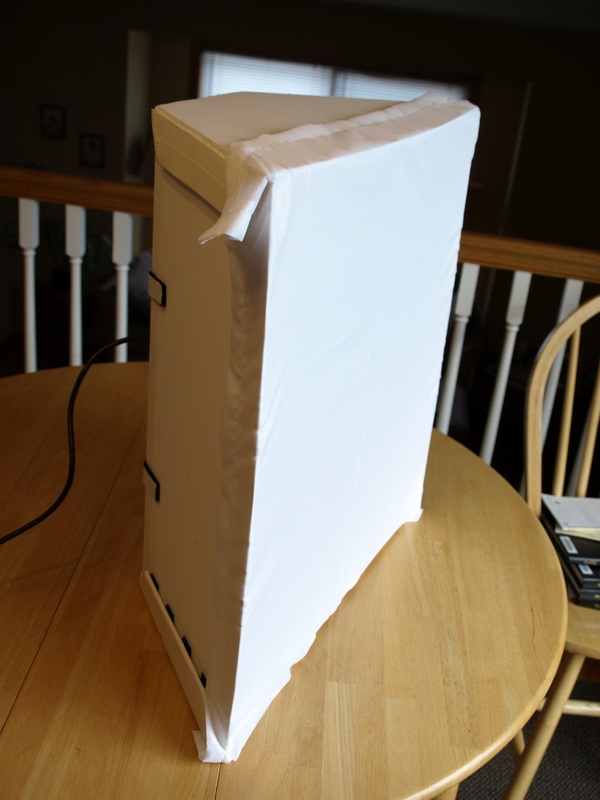
Step 5: The fabric cover

The original plans recommend cross stitch fabric - I didn't use that, I experimented with other thin white fabrics. I think cross stitch will work really well - diffuse, but still lets light through.
I had my wife sew a seam on the sheer fabric I used, to prevent fraying. (After I had to set up the machine for her; yep, we're that kind family.) A square of 23" x 23" worked for me. I used velcro, again, to attach the cover.
I had my wife sew a seam on the sheer fabric I used, to prevent fraying. (After I had to set up the machine for her; yep, we're that kind family.) A square of 23" x 23" worked for me. I used velcro, again, to attach the cover.
TIP:
Stretching the fabric on the box will pull the centers of the edges in, so start with a small square of velcro in the center of each side, working opposite sides of the box first, rather than, say, clockwise. Then add extra strips as needed
Done!
You're going to want at least 3 boxes. Four might give better light, but it may make things too crowded for taking pictures.
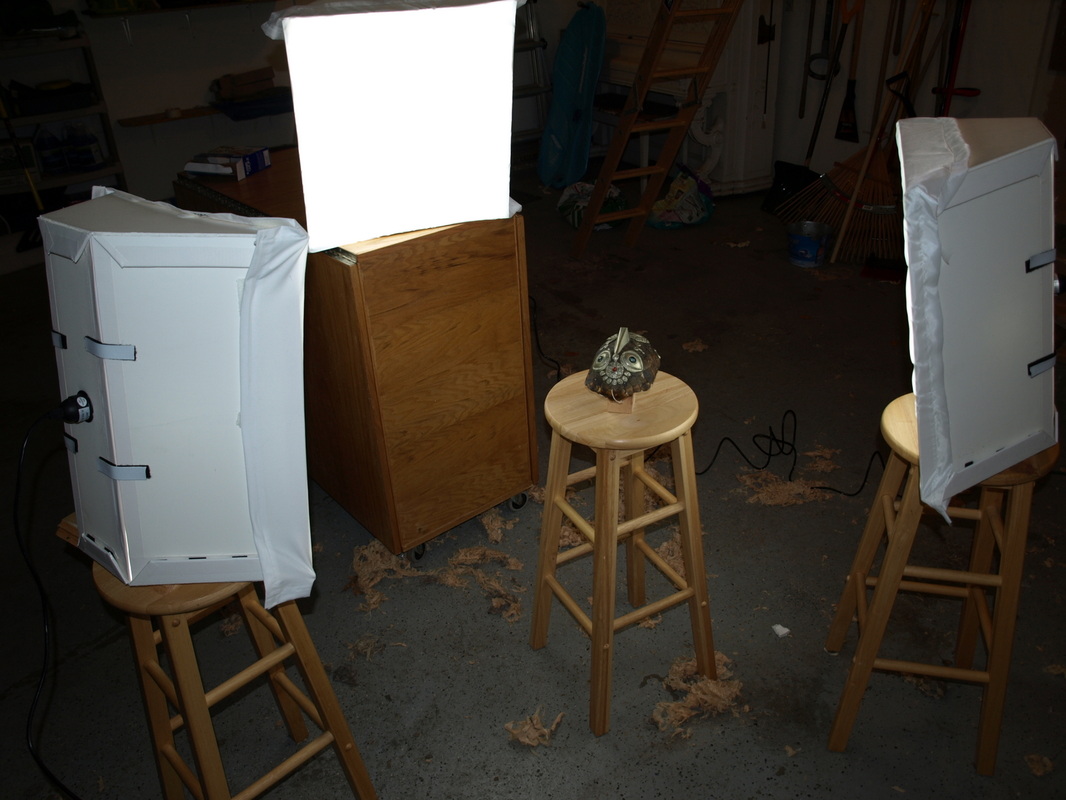
Now you're ready to take pictures!
Click here for Step 2: setting up the object and tips on getting the best images for your photogrammetry software.
Click here for Step 2: setting up the object and tips on getting the best images for your photogrammetry software.
